Identifying bird species on the edge using the Amazon SageMaker built-in Object Detection algorithm and AWS DeepLens
Custom object detection has become an important enabler for a wide range of industries and use cases—such as finding tumors in MRIs, identifying diseased crops, and monitoring railway platforms. In this blog post, we build a bird identifier based on an annotated public dataset. This type of model could be used in a number of different ways. You could use it to automate environmental studies for construction projects, or it could be used by bird enthusiasts when bird watching. You could also use this model as a working example to drive new ideas for your own use cases.
For this example, we use the built-in Object Detection algorithm provided by Amazon SageMaker. Amazon SageMaker is an end-to-end machine learning (ML) platform. By using built-in algorithms, developers can accelerate machine learning without needing expertise in using low-level ML frameworks, such as TensorFlow and MXNet. We’ll train the model in Amazon SageMaker’s fully managed and on-demand training infrastructure. Trained models can easily be hosted in the cloud or on the edge using AWS IoT Greengrass.
To demonstrate the use of custom object detection on the edge, we also show you how to deploy the trained model on AWS DeepLens, the world’s first deep-learning-enabled video camera for developers. AWS DeepLens helps put deep learning in the hands of developers, literally, with a fully programmable video camera, tutorials, code, and pre-trained models designed to expand deep learning skills.
The following diagram gives a high-level view how our bird identifier solution is built:
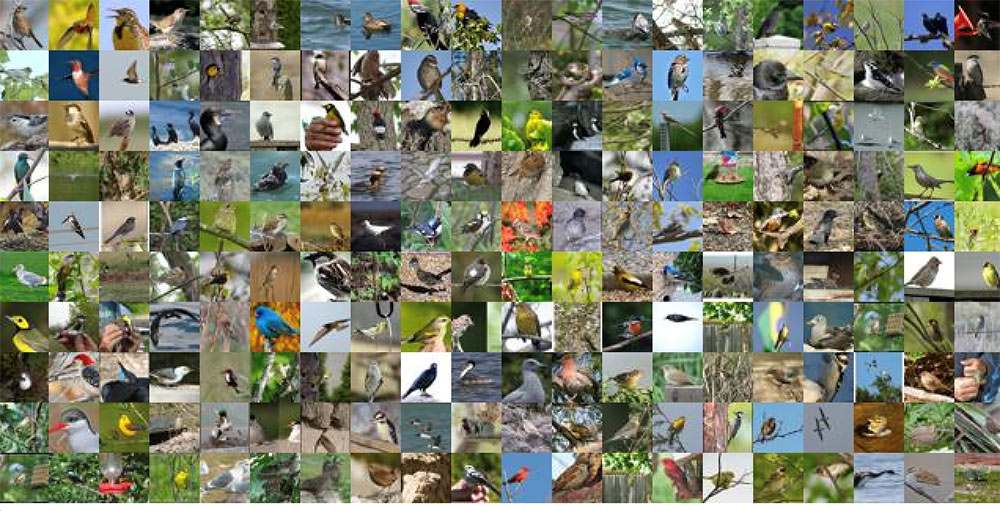
Understanding the dataset
The CUB 200-2011 birds dataset contains 11,788 images across 200 bird species (the original technical report can be found here). Each species comes with about 60 images, with a typical size of about 350 pixels by 500 pixels. Bounding boxes are provided, as are annotations of bird parts. A recommended train/test split is given, but image size data is not.
Preparing the image dataset
The most efficient way to provide image data to the Amazon SageMaker Object Detection algorithm is by using the RecordIO format. MXNet provides a tool called im2rec.py to create RecordIO files for your datasets. To use the tool, you provide listing files describing the set of images.
For object detection datasets, Amazon SageMaker needs bounding boxes to be described in terms of xmin, ymin, xmax, and ymax, which are ratios of the box corners to the full image. The CUB dataset bounding box instead gives you x, y, width, and height in pixels. See the following picture to understand the difference in metadata.
To address this discrepancy, we retrieve the size of each image and translate the absolute bounding box to have dimensions relative to the image size. In the following example, the box dimensions from the dataset are shown in black, while the dimensions required by RecordIO are shown in green.

The following Python code snippet shows how we converted the original bounding box dimensions to those needed by im2rec. See the sample Amazon SageMaker notebook for the full code.
With the listing files in place, the im2rec utility can be used to create the RecordIO files by executing the following command:
After the RecordIO files are created, they are uploaded to Amazon S3 as input to the Object Detection algorithm with the following Python code:
Training the object detection model using the Amazon SageMaker built-in algorithm
With the images available in Amazon S3, the next step is to train the model. Documentation for the object detection hyperparameters is available here. For our example, we have a few hyperparameters of interest:
- Number of classes and training samples.
- Batch size, epochs, image size, pre-trained model, and base network.
Note that the Amazon SageMaker Object Detection algorithm requires models to be trained on a GPU instance type such as ml.p3.2xlarge. Here is a Python code snippet for creating an estimator and setting the hyperparameters:
With the dataset uploaded, and the hyperparameters set, the training can be started using the following Python code:
For a subset of 5 species on an ml.p3.2xlarge instance type, we can get accuracy of 70 percent or more with 100 epochs in about 11 minutes.
You can create the training job using the AWS CLI, using a notebook, or using the Amazon SageMaker console.
Hosting the model using an Amazon SageMaker endpoint
After we have trained our model, we’ll host it on Amazon SageMaker. We use CPU instances, but you can also use GPU instances. Deployment from your Amazon SageMaker notebook takes a single line of Python code:
Testing the model
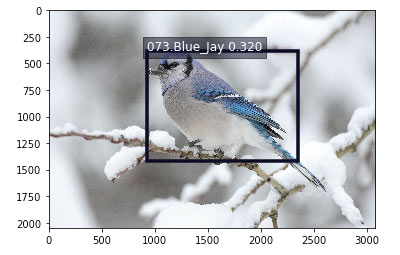
After the model endpoint is in service, we can pass in images that the model has not yet seen and see how well the birds are detected. See the sample notebook for a visualize_detections function. Given a URL to a bird image, here is the Python code to invoke the endpoint, get back a set of predicted bird species and their bounding boxes, and visualize the results:
Here is a sample result for an image of a blue jay:
Running your model on the edge using AWS DeepLens
In some use cases, an Amazon SageMaker hosted endpoint will be a sufficient deployment mechanism, but there are many use cases that require real-time object detection at the edge. Imagine a phone-based assistant app in a bird sanctuary. You walk around and point your app at a bird and instantly get details about the species (listen to the bird call, understand its habitat, etc.). No more guessing about what bird you just saw.
AWS DeepLens lets you experiment with deep learning on the edge, giving developers an easy way to deploy trained models and use Python code to come up with interesting applications. For our bird identifier, you could mount an AWS DeepLens device next to your kitchen window overlooking a set of bird feeders. The device could feed cropped images of detected birds to Amazon S3. It could even trigger a text to your mobile phone to let you know what birds visited.
A previous blog post covered how to deploy a custom image classification model on AWS DeepLens. For a custom object detection model, there are two differences:
- The model artifacts must be converted before being deployed.
- The model must be optimized before being loaded.
Let’s go into more detail on each of these differences.
Convert your model artifacts before deploying to AWS DeepLens
For custom object detection models produced by Amazon SageMaker, you need to perform an additional step if you want to deploy your models on AWS DeepLens. MXNet provides a utility function for converting the model. To get started with conversion, first clone the GitHub repository:
The next step is to download a copy of your model artifacts that were saved in Amazon S3 as a result of your training job. Extract the actual artifacts (a parameters file, a symbol file, and the hyperparameters file), and rename them so that they reflect the base network and the image size that were used in training. Here are the commands from a bash script you can use to perform the conversion:
After the contents have been extracted and renamed, invoke the conversion utility:
You can now remove the original files and create a new compressed tar file with the converted artifacts. Copy the new model artifacts file to Amazon S3, where it can be used when importing a new AWS DeepLens object detection model:
Note that the destination bucket for the patched model must have the word “deeplens” in the bucket name. Otherwise, you will get an error when importing the model in the AWS DeepLens console. A complete script for patching the model artifacts can be found here.
Optimize the model from your AWS Lambda function on AWS DeepLens
An AWS DeepLens project consists of a trained model and an AWS Lambda function. Using AWS IoT Greengrass on the AWS DeepLens, the inference Lambda function performs three important functions:
- It captures the image from a video stream.
- It performs an inference using that image against the deployed machine learning model.
- It provides the results to both AWS IoT and the output video stream.
AWS IoT Greengrass lets you execute AWS Lambda functions locally, reducing the complexity of developing embedded software. For details on creating and publishing your inference Lambda function, see this documentation.
When using a custom object detection model produced by Amazon SageMaker, there is an additional step in your AWS DeepLens inference Lambda function. The inference function needs to call MXNet’s model optimizer before performing any inference using your model. Here is the Python code for optimizing and loading the model:
Performing model inference on AWS DeepLens
Model inference from your AWS Lambda function is very similar to the steps we showed earlier for invoking a model using an Amazon SageMaker hosted endpoint. Here is a piece of the Python code for finding birds in a frame provided by the AWS DeepLens video camera:
A complete inference Lambda function for use on AWS DeepLens with this object detection model can be found here.
Conclusion
In this blog post, we have shown how to use the Amazon SageMaker built-in Object Detection algorithm to create a custom model for detecting bird species based on a publicly available dataset. We also showed you how to run that model on a hosted Amazon SageMaker endpoint and on the edge using AWS DeepLens. You can clone and extend this example for your own use cases. We would love to hear how you are applying this code in new ways. Please let us know your feedback by adding your comments.
About the author
 Mark Roy is a Solution Architect focused on Machine Learning, with a particular interest in helping customers and partners design computer vision solutions. In his spare time, Mark loves to play, coach, and follow basketball.