
Blog

Learn About Our Meetup

5000+ Members

MEETUPS

LEARN, CONNECT, SHARE

Join our meetup, learn, connect, share, and get to know your Toronto AI community. 

JOB POSTINGS

INDEED POSTINGS

Browse through the latest deep learning, ai, machine learning postings from Indeed for the GTA.

CONTACT

CONNECT WITH US

Are you looking to sponsor space, be a speaker, or volunteer, feel free to give us a shout.

Category: Amazon

Use Amazon Lex as a conversational interface with Twilio Media Streams

Businesses use the Twilio platform to build new ways to communicate with their customers: whether it’s fully automating a restaurant’s food orders with a conversational Interactive Voice Response (IVR) or building a next generation advanced contact center. With the launch of Media Streams, Twilio is opening up their Voice platform by providing businesses access to the raw audio stream of their phone calls in real time.

You can use Media Streams to increase productivity in the call center by transcribing speech in real time with Amazon Transcribe Streaming WebSockets or to automate end-user interactions and make recommendations to agents based on the caller’s intent using Amazon Lex.

In this blog post, we show you how to use Amazon Lex to integrate conversational interfaces (chatbots) to your voice application using the raw audio stream provided by Twilio Media Streams. Lex uses deep learning to do the heavy lifting required to recognize the intent of human speech so that you can easily build engaging user experiences and lifelike conversations.

The solution follows these steps:

  1. Receive audio stream from Twilio
  2. Send the audio stream to a voice activity detection component to determine voice in audio
  3. Start streaming the user data to Amazon Lex when voice is detected
  4. Stop streaming the user data to Amazon Lex when silence is detected
  5. Update the ongoing Twilio call based on the response from Amazon Lex

The Voice activity detection (VAD) implementation provided in this sample is for reference/demo purpose only and uses a rudimentary approach to detect voice and silence by looking at amplitude. It is not recommended for production use. You will need to implement a robust form of VAD module as per your need for use in production scenarios.

The diagram below describes the steps:

The instructions for integrating an Amazon Lex Bot with the Twilio Voice Stream are provided in the following steps:

  • Step 1: Create an Amazon Lex Bot
  • Step 2: Create a Twilio Account and Setup Programmable Voice
  • Step 3: Build and Deploy the Amazon Lex and Twilio Voice Stream Integration code to Amazon ECS/Fargate
  • Step 4: Test the deployed service
  • As an optional next step, you can build and test the service locally. For instructions, see Step 5 (Optional): Build and Test the service locally

To build and deploy the service, the following pre-requisites are needed:

  1. Python (The language used to build the service)
  2. Docker (The tool used for packaging the service for deployment)
  3. AWS CLI installed and configured (For creating the required AWS services and deploying the service to AWS). For instructions see, Configuring AWS CLI

In addition, you need a domain name for hosting your service and you must register an SSL certificate for the domain using Amazon Certificate Manager.  For instructions, see Request a Public Certificate. Record the Certificate ARN from the console.

An SSL certificate is needed to communicate securely over wss (WebSocket Secure), a persistent bidirectional communication protocol used by the Twilio voice stream. The <Stream> instruction in the templates/streams.xml file allows you to receive raw audio streams from a live phone call over WebSockets in near real-time. On successful connection, a WebSocket connection to the service is established and audio will start streaming.

Step 1: Create an Amazon Lex Bot

If you don’t already have an Amazon Lex Bot, create and deploy one. For instructions, see Create an Amazon Lex Bot Using a Blueprint (Console).

Once you’ve created the bot, deploy the bot and create an alias. For instructions, see Publish a Version and Create an Alias.

In order to call the Amazon Lex APIs from the service, you must create an IAM user with an access type “Programmatic Access” and attach the appropriate policies.

For this, in the AWS Console, go to IAM->Users->Add user

Provide a user name, select “Programmatic access” Access type, then click on “Next: Permissions”

Using the “Attach existing policies directly” option, filter for Amazon Lex policies and select AmazonLexReadOnly and AmazonLexRunBotsOnly policies.

Click “Next: Tags”, “Next: Review”, and “Create User” in the pages that follow to create the user. Record the access key ID and the secret access key. We use these credentials during the deployment of the stack.

Step 2: Create a Twilio account and setup programmable voice

Sign up for a Twilio account and create a programmable voice project.

For sign-up instructions, see https://www.twilio.com/console.

Record the “AUTH TOKEN”. You can find this information on the Twilio dashboard under Settings->General->API Credentials.

You must also verify the caller ID by adding the phone number that you are using to make calls to the Twilio phone number. You can do this by clicking on the   button on the Verify caller IDs page.

Step 3: Build and deploy the Amazon Lex and Twilio Stream Integration code to Amazon ECS

In this section, we create a new service using AWS Fargate to host the integration code. AWS Fargate is a deployment option in Amazon Elastic Container Service (ECS) that allows you to deploy containers without worrying about provisioning or scaling servers. For our service, we use Python and Flask in a Docker container behind an Application Load Balancer (ALB).

Deploy the core infrastructure

As the first step in creating the infrastructure, we deploy the core infrastructure components such as VPC, Subnets, Security Groups, ALB, ECS cluster, and IAM policies using a CloudFormation Template.

Clicking on the “Launch Stack” button below takes you to the AWS CloudFormation Stack creation page. Click “Next” and fill in the parameters. Please note that you will be using the same “EnvironmentName” parameter later in the process where we will be launching the service on top of the core infrastructure. This allows us to reference the stack outputs from this deployment.

Once the stack creation is complete, from the “outputs” tab, record the value of the “ExternalUrl” key.

Package and deploy the code to AWS

In order to deploy the code to Amazon ECS, we package the code in a Docker container and upload the Docker image to the Amazon Elastic Container Registry (ECR).

The code for the service is available at the GitHub repository below. Clone the repository on your local machine.

git clone https://github.com/veerathp/lex-twiliovoice.git
cd lex-twiliovoice

Next, we update the URL for the Streams element inside templates/streams.xml to match the DNS name for your service that you configured with the SSL certificate in the pre-requisites section.

<Stream url="wss://<Your DNS>/"></Stream>

Now, run the following command to build the container image using the Dockerfile.

docker build -t lex-twiliovoice .

Next, we create the container registry using the AWS CLI by passing in the value for the repository name. Record the “repositoryUri” from the output.

aws ecr create-repository --repository-name <repository name>

In order to push the container image to the registry, we must authenticate. Run the following command:

aws ecr get-login --region us-west-2 --no-include-email

Execute the output of the above command to complete the authentication process.

Next, we tag and push the container image to ECR.

docker tag lex-twiliovoice <repositoryUri>/lex-twiliovoice:latest
docker push <repositoryUri>/lex-twiliovoice:latest

We now deploy the rest of the infrastructure using a CloudFormation template. As part of this stack, we deploy components such as ECS Service, ALB Target groups, HTTP/HTTPS Listener rules, and Fargate Task. The environment variables are injected into the container using the task definition properties.

Since we are working with WebSocket connections in our service, we enable stickiness with our load balancer using the target group attribute to allow for persistent connection with the same instance.

TargetGroup:
    Type: AWS::ElasticLoadBalancingV2::TargetGroup
    Properties:
      ….
      ….
      TargetGroupAttributes:
        - Key: stickiness.enabled
          Value: true
        …

Clicking on the “Launch Stack” button below takes you to the AWS CloudFormation Stack creation page. Click “Next” and fill in the correct values for the following parameters that are collected from the previous steps – IAMAccessKeyId, IAMSecretAccessKey, ImageUrl, LexBotName, LexBotAlias, and TwilioAuthToken. You can use default values for all the other parameters. Make sure to use the same “EnvironmentName” from the previous stack deployment since we are referring to the outputs of that deployment.

Once the deployment is complete, we can test the service. However, before we do that, make sure to point your custom DNS to the Application Load Balancer URL.

To do that, we create an “A Record” under Route 53, Hosted Zones to point your custom DNS to the ALB Url that was part of the core infrastructure stack deployment (“ExternalUrl” key from output). In the “Create Record Set” screen, in the name field use your DNS name, for type select “A – IPv4 address”, select “Yes” for Alias field, select the Alias target as the ALB Url, and click “Create”.

Step 4: Test the deployed service

You can verify the deployment by navigating to the Amazon ECS Console and clicking on the cluster name. You can see the AWS Fargate service under the “services” tab and the running task under the “tasks” tab.

To test the service, we will first update the Webhook url field under the “Voice & Fax” section in the Twilio console with the URL of the service that is running in AWS (http://<url>/twiml). You can now call the Twilio phone number to reach the Lex Bot. Make sure that the number you are calling from is verified using the Twilio console. Once connected, you will hear the prompt “You will be interacting with Lex bot in 3, 2, 1. Go.” that is configured in the templates/streams.xml file. You can now interact with the Amazon Lex Bot.

You can monitor the service using the “CloudWatch Log Groups” and troubleshoot any issues that may arise while the service is running.

Step 5(Optional): Build and test the service locally

Now that the service is deployed and tested, you may be interested in building and testing the code locally. For this, navigate to the cloned GitHub repository on your local machine and install all the dependencies using the following command:

pip install -r requirements.txt

You can test the service locally by installing “ngrok”. See https://ngrok.com/download for more details. This tool provides public URLs for exposing the local web server. Using this, you can test the Twilio webhook integration.

Start the ngrok process by using the following command in another terminal window. The ngrok.io url can be used to access the web service from external applications.

ngrok http 8080

Next, configure the “Stream” element inside the templates/streams.xml file with the correct ngrok url.

<Stream url="wss://<xxxxxxxx.ngrok.io>/"></Stream>

In addition, we also need to configure the environment variables used in the code. Run the following command after providing appropriate values for the environment variables:

export AWS_REGION=us-west-2
export ACCESS_KEY_ID=<Your IAM User Access key ID from Step 1>
export SECRET_ACCESS_KEY=<Your IAM User Secret Access key from Step 1>
export LEX_BOT_NAME=<Bot name for the Lex Bot you created in Step 1>
export LEX_BOT_ALIAS=<Bot Alias for the Lex Bot you created in Step 1>
export TWILIO_AUTH_TOKEN=<Twilio AUTH TOKEN from Step 2>
export CONTAINER_PORT=8080
export URL=<http://xxxxxxxx.ngrok.io> (update with the appropriate url from ngrok)

Once the variables are set, you can start the service using the following command:

python server.py

To test, configure the Webhook field under “Voice & Fax” in the Twilio console with the correct url (http://<url>/twiml) as shown below.

Initiate a call to the Twilio phone number from a verified phone. Once connected, you hear the prompt “You will be interacting with Lex bot in 3, 2, 1. Go.” that is configured in the templates/streams.xml file. You are now able to interact with the Amazon Lex bot that you created in Step 1.

In this blog post, we showed you how to use Amazon Lex to integrate your chatbot to your voice application. To learn how to build more with Amazon Lex, check out the developer resources.


About the Author

Praveen Veerath is a Senior AI Solutions Architect for AWS.


Harvesting success using Amazon SageMaker to power Bayer’s digital farming unit

By the year 2050, our planet will need to feed ten billion people. We can’t expand the earth to create more agricultural land, so the solution to growing more food is to make agriculture more productive and less resource-dependent. In other words, there is no room for crop losses or resource waste. Bayer is using Amazon SageMaker to help eliminate losses from happening in fields around the world.

Households contribute to food loss by discarding food such as kitchen waste or leftover cooked meals. However, the vast majority of food loss in many countries is actually from crops that “die on the vine” in one form or another—from pests, diseases, weeds, or poor nutrition in the soil. The Climate Corporation—a Bayer subsidiary—provides digital farming offerings that help resolve these challenges.

The Climate Corporation’s solutions include automatic recording of data from tractors and satellite-enabled field-health maps. By delivering these services and others to thousands of farmers globally, The Climate Corporation enables farmers to keep their land healthy and fertile.

The team is also working on an upcoming service called FieldCatcher that enables farmers to use smartphone images to identify weeds, pests, and diseases. “By using image recognition, we provide farmers with access to a virtual agronomist that helps with the often difficult task to identify the cause of crop issues. This empowers farmers who don’t have access to advice, as well as enable all farmers to more efficiently capture and share field observations,” said Matthias Tempel, Proximal Sensing Lead at The Climate Corporation.

FieldCatcher uses image recognition models trained with Amazon SageMaker, then optimizes them for mobile phones with Amazon SageMaker Neo. With this setup, the farmers are able to use the model and get instant results even without internet access (as many fields lack connectivity). Using Amazon SageMaker helps FieldCatcher to identify the cause of the problem with confidence, which is critical to providing farmers with the right remediation guidance. In many cases, acting immediately and being certain about an issue makes a huge difference for fields’ yields and farmers’ success.

To power the FieldCatcher solution, Bayer collects images—seeking a wide variety as well as a high quantity to create training data that includes various environments, growth stages, weather conditions, and levels of daylight. Each photo is uploaded from a smartphone and eventually becomes part of the ongoing library that makes the recognition better and better. The figure below depicts the journey of each image and its metadata.

Specifically, the process starts with ingestion to Amazon Cognito, which protects uploads to the Amazon API Gateway and Amazon Simple Storage Service (Amazon S3). The serverless architecture—chosen because it is more scalable and easier to maintain than any alternative—relies on AWS Lambda to execute its steps and finally move the received data into a data lake.

Multiple AWS services work in concert to support the data lake. In addition to Amazon S3 for image storing, Amazon DynamoDB stores the metadata, as features of the image such as location and date taken are important for searchability later on. Amazon Elasticsearch Service (Amazon ES) powers the indexing and querying of this metadata.

The engineering team appreciates that this set of services does not require a data schema to be defined upfront, enabling many different possible use cases for images to be collected in the FieldCatcher application. Another benefit is that the data lake queries allow questions as different as “search for all images taken in Germany with an image resolution larger than 800×600 pixels” or “search for all images of diseases in winter wheat.”

For machine learning (ML) model development, training, and inferencing, the team relies on Amazon SageMaker. Specifically, Amazon SageMaker’s built-in Jupyter notebooks are the central workspace for developing ML models as well as the corresponding ML algorithms. Developers also use GitLab for source code management and GitLab-CI for automated tasks.

AWS Step Functions are the final piece, used to support the full roundtrip of preprocessing images from the data lake, automated training of ML models, and finally inference. Using these services, Bayer’s developers can operate with confidence in the infrastructure and can focus on the ML models.

The Bayer team members, as longstanding AWS users, are familiar with the power of ML to solve problems that would otherwise be exceedingly complex for humans to tackle. The company previously developed an AWS based data-collection and analysis platform that leverages AWS IoT and sensors in the harvest fields to power real-time decision-making with information fed to mobile devices.

Their choice to expand their offerings to include the new FieldCatcher application was driven by the positive feedback from some of these other services. Giuseppe La Tona, Enterprise Solution Architect at The Climate Corporation described, “We used to make this type of service fully ourselves, but it was an enormous amount of work to do and maintain. We realized that, with Amazon SageMaker, the solution was infinitely easier, so we started implementing it and have never looked back.”

At the moment, FieldCatcher is used internally in over 20 countries around the world. The next step is expanding what it can offer farmers. Right now, its main use is for weed, disease, or pest detection. The Climate Corporation is exploring additional ML-powered solutions as broad as predicting harvest quality with images and drone-based crop protection on an individual plant level. 

Going forward, the team plans to use Amazon SageMaker for all their ML work, as it has been so powerful and saved them so much time. In fact, the team’s entire workflow uses only AWS for ML. Alexander Roth Cloud Architect at Bayer, explained, “With machine learning on AWS, the huge impact we’ve seen is that the whole pipeline runs smoothly and we’re able to reduce errors.”

With these solutions in place and constantly improving (as is inherent to ML), Bayer and The Climate Corporation see themselves as pioneering the sustainable agriculture of the future. Their hope is that this effort and others it inspires will make it possible to support our growing population for years to come.


About the Author

Marisa Messina is on the AWS ML marketing team, where her job includes identifying the most innovative AWS-using customers and showcasing their inspiring stories. Prior to AWS, she worked on consumer-facing hardware and then university-facing cloud offerings at Microsoft. Outside of work, she enjoys exploring the Pacific Northwest hiking trails, cooking without recipes, and dancing in the rain.


Git integration now available for the Amazon SageMaker Python SDK

Git integration is now available in the Amazon SageMaker Python SDK. You no longer have to download scripts from a Git repository for training jobs and hosting models. With this new feature, you can use training scripts stored in Git repos directly when training a model in the Python SDK. You can also use hosting scripts stored in Git repos when hosting a model. The scripts are hosted in GitHub, another Git-based repo, or an AWS CodeCommit repo.

This post describes in detail how to use Git integration with the Amazon SageMaker Python SDK.

Overview

When you train a model with the Amazon SageMaker Python SDK, you need a training script that does the following:

  • Loads data from the input channels
  • Configures training with hyperparameters
  • Trains a model
  • Saves the model

You specify the script as the value of the entry_point argument when you create an estimator object.

Previously, when users constructed an Estimator or Model object, in the Python SDK, the training script had to be a path in the local file system when you provided it as the entry_point value. This location was inconvenient when you had training scripts in Git repos because you had to download them locally.

If multiple developers were contributing to the Git repo, you would have to keep track of any updates to the repo. Also, if your local version was out of date, you’d need to pull the latest version prior to every training job. This also makes scheduling periodic training jobs even more challenging.

With the launch of Git integration, these issues are solved, which results in a notable improvement in convenience and productivity.

Walkthrough

Enable the Git integration feature by passing a dict parameter named git_config when you create the Estimator or Model object. The git_config parameter provides information about the location of the Git repo that contains the scripts and the authentication for accessing that repo.

Locate the Git repo

To locate the repo that contains the scripts, use the repo, branch, and commit fields in git_config. The repo field is required; the other two fields are optional. If you only provide the repo field, the latest commit in master branch is used by default:

git_config = {'repo': 'your-git-repo-url'}

To specify a branch, use both the repo and branch fields. The latest commit in that branch is used by default:

git_config = {'repo': 'your-git-repo-url', 'branch': 'your-branch'}

To specify a commit of a specific branch in a repo, use all three fields in git_config:

git_config = {'repo': 'your-git-repo-url', 
              'branch': 'your-branch', 
              'commit': 'a-commit-sha-under-this-branch'}

If only the repo and commit fields are provided, this works when the commit is under the master branch and the commit is used. However, if the commit is not under the master branch, the repo is not found:

git_config = {'repo': 'your-git-repo-url', 'commit': 'a-commit-sha-under-master'}

Get access to the Git repo

If the Git repo is private (all CodeCommit repos are private), you need authentication information to access it.

For CodeCommit repos, first make sure that you set up your authentication method. For more information, see Setting Up for AWS CodeCommit. The topic lists the following ways by which you can authenticate:

Authentication for SSH URLs

For SSH URLs, you must configure the SSH key pair. This applies to GitHub, CodeCommit, and other Git-based repos.

Do not set an SSH key passphrase for the SSH key pairs. If you do, access to the repo fails.

After the SSH key pair is configured, Git integration works with SSH URLs without further authentication information:

# for GitHub repos
git_config = {'repo': 'git@github.com:your-git-account/your-git-repo.git'}

# for CodeCommit repos
git_config = {'repo': 'ssh://git-codecommit.us-west-2.amazonaws.com/v1/repos/your-repo/'}

Authentication for HTTPS URLs

For HTTPS URLs, there are two ways to deal with authentication:

  • Have it configured locally.
  • Configure it by providing extra fields in git_config, namely 2FA_enabled, username, password, and token. Things can be slightly different here between CodeCommit, GitHub, and other Git-based repos.

Authenticating using Git credentials

If you authenticate with Git credentials, you can do one of the following:

  1. Provide the credentials in git_config:
    git_config = {'repo': 'https://git-codecommit.us-west-2.amazonaws.com/v1/repos/your-repo/',
                  'username': 'your-username',
                  'password': 'your-password'}

  2. Have the credentials stored in local credential storage. Typically, the credentials are stored automatically after you provide them with the AWS CLI. For example, macOS stores credentials in Keychain Access.

With the Git credentials stored locally, you can specify the git_config parameter without providing the credentials, to avoid showing them in scripts:

git_config = {'repo': 'https://git-codecommit.us-west-2.amazonaws.com/v1/repos/your-repo/'}

Authenticating using AWS CLI Credential Helper

If you follow the setup documentation mentioned earlier to configure AWS CLI Credential Helper, you don’t have to provide any authentication information.

For GitHub and other Git-based repos, check whether two-factor authentication (2FA) is enabled for your account. (Authentication is disabled by default and must be enabled manually.) For more information, see Securing your account with two-factor authentication (2FA).

If 2FA is enabled for your account, provide 2FA_enabled when specifying git_config and set it to True. Otherwise, set it to False. If 2FA_enabled is not provided, it is set to False by default. Usually, you can use either username+password or a personal access token to authenticate for GitHub and other Git-based repos. However, when 2FA is enabled, you can only use a personal access token.

To use username+password for authentication:

git_config = {'repo': 'https://github.com/your-account/your-private-repo.git',
              'username': 'your-username',
              'password': 'your-password'}

Again, you can store the credentials in local credential storage to avoid showing them in the script.

To use a personal access token for authentication:

git_config = {'repo': 'https://github.com/your-account/your-private-repo.git',
              'token': 'your-token'}

Create the estimator or model with Git integration

After you correctly specify git_config, pass it as a parameter when you create the estimator or model object to enable Git integration. Then, make sure that the entry_point, source_dir, and dependencies are all be relative paths under the Git repo.

You know that if source_dir is provided, entry_point should be a relative path from the source directory. The same is true with Git integration.


For example, with the following structure of the Git repo ‘amazon-sagemaker-examples’ under branch ‘training-scripts’:

amazon-sagemaker-examples 
   |
   |-------------char-rnn-tensorflow
   |                          |----------train.py
   |                          |----------utils.py
   |                          |----------other files
   |
   |-------------pytorch-rnn-scripts
   |-------------.gitignore
   |-------------README.md

You can create the estimator object as follows:

git_config = {'repo': 'https://github.com/awslabs/amazon-sagemaker-examples.git', 'branch': 'training-scripts'}

estimator = TensorFlow(entry_point='train.py',
                       source_dir='char-rnn-tensorflow',
                       git_config=git_config,
                       train_instance_type=train_instance_type,
                       train_instance_count=1,
                       role=sagemaker.get_execution_role(), # Passes to the container the AWS role that you are using on this notebook
                       framework_version='1.13',
                       py_version='py3',
                       script_mode=True)

In this example, source_dir 'char-rnn-tensorflow' is a relative path inside the Git repo, while entry_point 'train.py' is a relative path under ‘char-rnn-tensorflow’.

Git integration example

Now let’s look at a complete example of using Git integration. This example trains a multi-layer LSTM RNN model on a language modeling task based on PyTorch example. By default, the training script uses the Wikitext-2 dataset. We train a model on SageMaker, deploy it, and then use deployed model to generate new text.

Run the commands in a Python script, except for those that start with a ‘!’, which are bash commands.

First let’s do the setup:

import sagemaker
 sagemaker_session = sagemaker.Session()
 bucket = sagemaker_session.default_bucket()
 prefix = 'sagemaker/DEMO-pytorch-rnn-lstm'
 role = sagemaker.get_execution_role()

Next get the dataset. This data is from Wikipedia and is licensed CC-BY-SA-3.0. Before you use this data for any other purpose than this example, you should understand the data license, described at https://creativecommons.org/licenses/by-sa/3.0/:

!wget http://research.metamind.io.s3.amazonaws.com/wikitext/wikitext-2-raw-v1.zip
 !unzip -n wikitext-2-raw-v1.zip
 !cd wikitext-2-raw
 !mv wiki.test.raw test && mv wiki.train.raw train && mv wiki.valid.raw valid

Upload the data to S3:

inputs = sagemaker_session.upload_data(path='wikitext-2-raw', bucket=bucket, key_prefix=prefix)

Specify git_config and create the estimator with it:

from sagemaker.pytorch import PyTorch

git_config = {'repo': 'https://github.com/awslabs/amazon-sagemaker-examples.git', 'branch': 'training-scripts'}

estimator = PyTorch(entry_point='train.py',
                     role=role,
                     framework_version='1.1.0',
                     train_instance_count=1,
                     train_instance_type='ml.c4.xlarge',
                     source_dir='pytorch-rnn-scripts',
                     git_config=git_config,
                     hyperparameters={
                         'epochs': 6,
                         'tied': True
                     })

Train the mode:

estimator.fit({'training': inputs})

Next let’s host the model. We are going to provide custom implementation of model_fninput_fnoutput_fn, and predict_fn hosting functions in a separate file ‘generate.py’, which is in the same Git repo. The PyTorch model uses a npy serializer and deserializer by default. For this example, since we have a custom implementation of all the hosting functions and plan on using JSON instead, we need a predictor that can serialize and deserialize JSON:

from sagemaker.predictor import RealTimePredictor, json_serializer, json_deserializer

 class JSONPredictor(RealTimePredictor):
     def __init__(self, endpoint_name, sagemaker_session):
         super(JSONPredictor, self).__init__(endpoint_name, sagemaker_session, json_serializer, json_deserializer)

Create the model object:

from sagemaker.pytorch import PyTorchModel

training_job_name = estimator.latest_training_job.name
desc = sagemaker_session.sagemaker_client.describe_training_job(TrainingJobName=training_job_name)
trained_model_location = desc['ModelArtifacts']['S3ModelArtifacts']
model = PyTorchModel(model_data=trained_model_location,
                      role=role,
                      framework_version='1.0.0',
                      entry_point='generate.py',
                      source_dir='pytorch-rnn-scripts',
                      git_config=git_config,
                      predictor_cls=JSONPredictor)

Create the hosting endpoint:

predictor = model.deploy(initial_instance_count=1, instance_type='ml.m4.xlarge')

Now we are going to use our deployed model to generate text by providing random seed, temperature (higher will increase diversity), and number of words we would like to get:

input = {
     'seed': 111,
     'temperature': 2.0,
     'words': 100
 }
 response = predictor.predict(input)
 print(response)

You get the following results:

acids west 'igan 1232 keratinous Andrews argue cancel mauling even incorporating Jewish
centimetres Fang Andres cyclic logjams filth nullity Homarinus pilaris Emperors whoops punts
followed Reichsgau envisaged Invisible alcohols are osteoarthritis twilight Alexandre Odes Bucanero Genesis
crimson Hutchison genus Brighton 1532 0226284301 Harikatha p Assault Vaisnava plantie 1829
Totals established outcast hurricane herbs revel Lebens Metoposaurids Pajaka initialize frond discarding
walking Unusually Ľubomír Springboks reviewing leucocythemia blistered kinder Nowels arriving 1350 Weymouth
Saigon cantonments genealogy alleging Upright typists termini doodle conducts parallelisms cypresses consults
others estate cover passioned recognition channelled breathed straighter Visibly dug blanche motels
Barremian quickness constrictor reservist 

Finally delete the endpoint after you are done using it:

sagemaker_session.delete_endpoint(predictor.endpoint)

Conclusion

In this post, I walked through how to use Git integration with the Amazon SageMaker Python SDK. With Git integration, you no longer have to download scripts from Git repos for training jobs and hosting models. Now you can use scripts in Git repos directly, simply by passing an additional parameter git_config when creating the Estimator or Model object.

If you have questions or suggestions, please leave them in the comments.


About the Authors

Yue Tu is a summer intern on the AWS SageMaker ML Frameworks team. He works on Git integration for the SageMaker Python SDK during his internship. Outside of work he likes playing basketball, his favorite basketball teams are the Golden State Warriors and Duke basketball team. He also likes paying attention to nothing for some time.


Chuyang Deng is a software development engineer on the AWS SageMaker ML Frameworks team. She enjoys playing LEGO alone.


Using model attributes to track your training runs on Amazon SageMaker

With a few clicks in the Amazon SageMaker console or a few one-line API calls, you can now quickly search, filter, and sort your machine learning (ML) experiments using key model attributes, such as hyperparameter values and accuracy metrics, to help you more quickly identify the best models for your use case and get to production faster. The new Amazon SageMaker model tracking capability is available through both the console and AWS SDKs in all available AWS Regions, at no additional charge.

Developing an ML model requires experimenting with different combinations of data, algorithm, and parameters—all the while evaluating the impact of small, incremental changes on performance and accuracy. This iterative fine-tuning exercise often leads to data explosion, with hundreds or sometimes thousands of experiments spread across many versions of a model.

Managing these experiments can significantly slow down the discovery of a solution. It also makes it tedious to trace back the lineage of a given model version so that the exact ingredients that went into brewing it can be identified. This adds unnecessary extra work to auditing and compliance verifications. The result is that new models don’t move to production fast enough to provide better solutions to problems.

With Amazon SageMaker’s new model tracking capabilities, you can now find the best models for your use case by searching on key model attributes—such as the algorithm used, hyperparameter values, and any custom tags. Using custom tags lets you find the models trained for a specific project or created by a specific data science team, helping you meaningfully categorize and catalog your work.

You can also rank and compare your model training attempts based on their performance metrics, such as training loss and validation accuracy. Do this right in the Amazon SageMaker console to more easily pick the best models for your use case. Finally, you can use the new model tracking capability to trace the lineage of a model all the way back to the dataset used in training and validating the model.

Now, I dive into the step-by-step experience of using this new capability.

Find and evaluate model training experiments

In this example, you train a simple binary classification model on the MNIST dataset using the Amazon SageMaker Linear Learner algorithm. The model predicts whether a given image is of the digit 0 or otherwise. You tune the hyperparameters of the Linear Learner algorithm, such as mini_batch_size, while evaluating the binary_classification_accuracy metric that measures the accuracy of predictions made by the model. You can find the code for this example in the sample notebook in the amazon-sagemaker-examples GitHub repo.

Step 1: Set up the experiment tracking by choosing a unique label for tagging all of the model training runs

You can also add the tag using the Amazon SageMaker Python SDK API while you are creating a training job using the Amazon SageMaker estimator.

You can also add the tag using the Amazon SageMaker Python SDK API while you are creating a training job using SageMaker estimator.

linear_1 = sagemaker.estimator.Estimator(
  linear_learner_container, role, 
  train_instance_count=1, train_instance_type = 'ml.c4.xlarge',
  output_path=<you model output S3 path URI>,
  tags=[{"Key":"Project", "Value":"Project_Binary_Classifier"}],
  sagemaker_session=sess)

Step 2: Perform multiple model training runs with new hyperparameter settings

For demonstration purposes, try three different batch_sizes values of 100, 200, and 300. Here is some example code:

linear_1.set_hyperparameters(feature_dim=784,predictor_type='binary_classifier', mini_batch_size=100)
linear_1.fit({'train': <your training dataset S3 URI>})

You are consistently tagging all three model training runs with the same unique label so you can track them under the same project. In the next step, I show how you can find and group all model training runs labeled with the “Project” tag.

Step 3: Find the relevant training runs for further evaluation

You can find the training runs on the Amazon SageMaker console.

You can search for the tag used in Steps 1 and 2.

This lists all labeled training runs in a table.

You can also use the AWS SDK API for Amazon SageMaker.

………………
search_params={
   "MaxResults": 10,
   "Resource": "TrainingJob",
   "SearchExpression": { 
      "Filters": [{ 
            "Name": "Tags.Project",
            "Operator": "Equals",
            "Value": "Project_Binary_Classifier"
         }]},
  "SortBy": "Metrics.train:binary_classification_accuracy",
  "SortOrder": "Descending"
}
smclient = boto3.client(service_name='sagemaker')
results = smclient.search(**search_params)

While I have demonstrated searching by tags, you can search using any metadata for model training runs. This includes the learning algorithm used, training dataset URIs, and ranges of numerical values for hyperparameters and model training metrics.

Step 4: Sort on the objective performance metric of your choice to get the best model

The model training runs identified in Step 3 are presented to you in a table, with all of the hyperparameters and training metrics presented in sortable columns. Choose the column header to rank the training runs for the objective performance metric of your choice, in this case, binary_classification_accuracy.

You can also print the table inline in your Amazon SageMaker Jupyter notebooks. Here is some example code:

import pandas
headers=["Training Job Name", "Training Job Status", "Batch Size", "Binary Classification Accuracy"]
rows=[]
for result in results['Results']: 
    trainingJob = result['TrainingJob']
    metrics = trainingJob['FinalMetricDataList']
    rows.append([trainingJob['TrainingJobName'],
     trainingJob['TrainingJobStatus'],
     trainingJob['HyperParameters']['mini_batch_size'],
     metrics[[x['MetricName'] for x in  
     metrics].index('train:binary_classification_accuracy')]['Value']
    ])
df = pandas.DataFrame(data=rows,columns=headers)
from IPython.display import display, HTML
display(HTML(df.to_html()))

As you can see in Step 3, you had already given the sort criteria in the search() API call for returning the results sorted on the metric of interest as follows:

"SortBy":  "Metrics.train:binary_classification_accuracy" 
"SortOrder": "Descending"

The previous example code parses the JSON response and presents the results in a leaderboard format, which looks like the following:

Now that you have identified the best model—with batch_size = 300, and classification accuracy of 0.99344—you can now deploy this model to a live endpoint. The sample notebook has step-by-step instructions for deploying an Amazon SageMaker endpoint.

Tracing a model’s lineage

Now I show an example of picking a prediction endpoint and quickly tracing back to the model training run used in creating the model in the first place.

Using single-click on the Amazon SageMaker console

In the left navigation pane of the Amazon SageMaker console, choose Endpoints, and select the relevant endpoint from the list of all your deployed endpoints. Scroll to Endpoint Configuration Settings, which lists all the model versions deployed at the endpoint. You see an additional hyperlink to the model training job that created that model in the first place.

Using the AWS SDK for Amazon SageMaker

You can also use few simple one-line API calls to quickly trace the lineage of a model.

#first get the endpoint config for the relevant endpoint
endpoint_config = smclient.describe_endpoint_config(EndpointConfigName=endpointName)

#now get the model name for the model deployed at the endpoint. 
model_name = endpoint_config['ProductionVariants'][0]['ModelName']

#now look up the S3 URI of the model artifacts
model = smclient.describe_model(ModelName=model_name)
modelURI = model['PrimaryContainer']['ModelDataUrl']

#search for the training job that created the model artifacts at above S3 URI location
search_params={
   "MaxResults": 1,
   "Resource": "TrainingJob",
   "SearchExpression": { 
      "Filters": [ 
         { 
            "Name": "ModelArtifacts.S3ModelArtifacts",
            "Operator": "Equals",
            "Value": modelURI
         }]}
}
results = smclient.search(**search_params)

Get started with more examples and developer support

Now that you have seen examples of how to efficiently manage the ML experimentation process and trace a model’s lineage, you can try out a sample notebook in the amazon-sagemaker-examples GitHub repo. For more examples, see our developer guide, or post your questions on the Amazon SageMaker forum. Happy experimenting!


About the Author

Sumit Thakur is a Senior Product Manager for AWS Machine Learning Platforms where he loves working on products that make it easy for customers to get started with machine learning on cloud. In his spare time, he likes connecting with nature and watching sci-fi TV series.


This post was originally published November 28, 2018. Last updated August 2, 2019.

Announcing two new AWS DeepLens sample projects with step-by-step instructions

We are excited to announce the launch of two new sample projects: “Build a worker safety system” and “Who drinks the most coffee?” for AWS DeepLens. These sample projects provide guided instructions on how to use computer vision to build a complete machine learning application on AWS. The applications span the edge and the cloud, integrating models running on the device with the AWS services on the cloud. The sample projects consist of step-by-step instructions, complete with code and a video tutorial for developers to build the application from scratch.

AWS DeepLens is the world’s first deep learning enabled video camera built to help developers of all skill levels to get started with deep learning. The new (2019) edition of the AWS DeepLens can now be purchased in six countries (USUKGermanyFranceSpainItaly, and Canada), and preordered in Japan. The 2019 edition is easier to set up, and (thanks to Amazon SageMaker Neo) runs machine learning models up to twice as fast as the earlier edition.

To get started with these fully guided sample projects, navigate to the AWS DeepLens management console. On the left navigation, navigate to Recipes to access the latest step-by-step tutorials. Choose a Recipe and follow the instructions provided to build the machine learning application. AWS DeepLens management console is available in Asia Pacific (Tokyo), EU (Frankfurt), and US-East (N. Virginia) Regions.

The following Recipes are available:

1) Build a worker safety system:

Use AWS DeepLens and Amazon Rekognition to build an application that helps identify if a person at a construction site is wearing the right safety gear, in this case, a hard hat. In this Recipe, developers learn to use the face detection model available on AWS DeepLens to detect a face and upload it to S3 for further processing. Developers learn to write a Lambda function that gets triggered on an S3 upload and integrates with Amazon Rekognition to detect if the person is not wearing a helmet. If no helmet is detected, the Lambda function sends a violation log to Amazon CloudWatch and alerts via AWS IoT. Developers also learn to build a web portal that shows the alert live.

2) Who drinks the most coffee?

Learn to build an application that counts the number of cups of coffee that people drink and displays the tally on a leaderboard. This Recipe uses face detection to track the number of people that drink coffee. As part of this Recipe, developers learn to write a Lambda function that gets triggered when a face is detected. Then, Amazon Rekognition is used to detect the presence of a coffee mug, and the face is added to a DynamoDB database that is maintained by (and private to) the developer. The Recipe also features a leaderboard that tracks the number of coffees over time.

If you have any questions regarding Recipes, please reach out to us on AWS DeepLens developer forum. For project inspiration, visit the AWS DeepLens Community Projects to find videos, descriptions, and links to GitHub repos.

Happy building!


About the Author

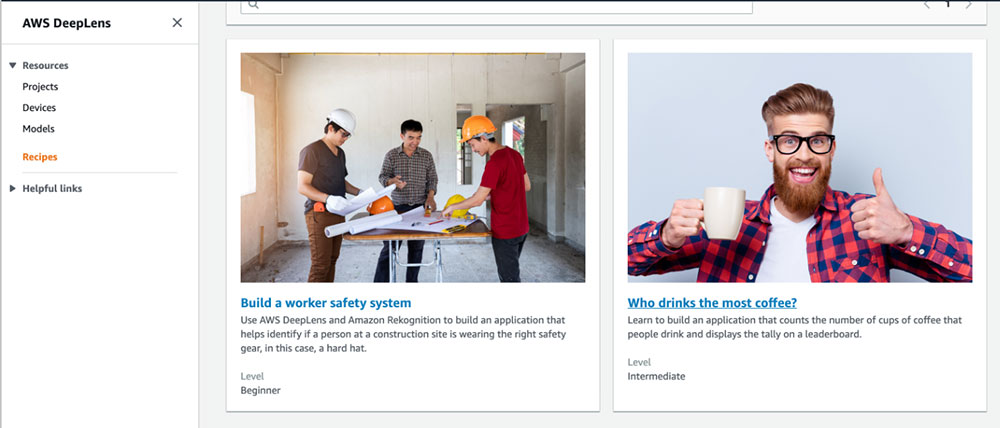
Jyothi Nookula is a Senior Product Manager for AWS DeepLens. She loves to build products that delight her customers. In her spare time, she loves to paint and host charity fund raisers for her art exhibitions.


AWS DeepRacer Scholarship Challenge from Udacity is now open for enrollment

The race is on! Start your engines! The AWS DeepRacer Scholarship Challenge from Udacity is now open for enrollment.

As mentioned in our previous post, the AWS DeepRacer Scholarship Challenge program introduces you—no matter what your developer skill levels are—to essential machine learning (ML) concepts in a fun and engaging way. Each month, you put your skills to the test in the world’s first global autonomous racing league, the AWS DeepRacer League, and compete for top spots in each month’s unique race course.

Students that record the top lap times in August, September, and October 2019 qualify for one of 200 full scholarships to the Machine Learning Engineer nanodegree program, sponsored by Udacity.

What is AWS DeepRacer?

In November 2018, Jeff Barr announced the launch of AWS DeepRacer on the AWS News Blog as a new way to learn ML. With AWS DeepRacer, you have an opportunity to get hands-on with a fully autonomous 1/18th-scale race car driven by reinforcement learning (RL), a 3D-racing simulator, and a global racing league.

How does the AWS DeepRacer Scholarship Challenge work?

The program begins today, August 1, 2019 and runs through October 31, 2019. You can join the scholarship community at any point during these three months for free.

After enrollment, you go through the AWS DeepRacer: Driven by Reinforcement Learning course developed by AWS Training and Certification. The course consists of short, step-by-step modules (90 minutes in total). The modules prepare you to create, train, and fine-tune an RL model in the AWS DeepRacer 3D racing simulator.

After you complete the course, you can enter the AWS DeepRacer virtual league. The enrolled students who record the top lap times in August, September, and October 2019 qualify for one of 200 full scholarships to the Udacity Machine Learning Engineer nanodegree program.

Throughout the program and during each race, you have access to a supportive community to get pro tips from experts and exchange ideas with your classmates.

“Developers have a great opportunity here to follow a focused learning curriculum designed to get started in Reinforcement Learning”- “Sunil Mallya, principal deep learning scientist, ML Solution Labs AWS”

Expert tips and tricks

Now that you have enrolled and are racing, you may benefit from expert racing tricks to race to the top. In the pit stop, you learn great racing tips and access valuable tools like the log analysis tool. Also, there’s a hack you can use, developed by an AWS DeepRacer participant ARCC, for running the training jobs locally in a Docker container.

You can clone your previous model to train a better model. I know this sounds complicated but, if you clone a previously trained model as the starting point of a new round of training, you could improve the training efficiency. To do this, you can modify the hyper-parameters to make use of already learned knowledge. “- Law Mei Ching Pearly Jean, youngest AWS DeepRacer League competitor

The tips and tools help you submit a performant model for the challenge—eventually increasing your chance of topping the leaderboard and winning one of the 200 ML nanodegree scholarships from Udacity.

“The AWS DeepRacer League has become quite addictive as the competition is pretty intense. What’s great though is that even though everyone is trying to win, that hasn’t kept people from sharing what they have learned. There is a great community around this product and it’s cool to see the impact it’s having with helping people get introduced to the field of Machine Learning.” – Alex Schultz, machine learning software engineer

You can add more code to the AWS DeepRacer workshop repository on GitHub, and create more tools and tips for the community to make model development using RL easy and useful. To learn more about ML on AWS, see Get Started with Machine Learning – No PhD Required.

Next steps

Developers, register now! The first challenge starts August 1, 2019. For a program FAQ, see AWS DeepRacer Scholarship Challenge.


About the Author

Tara Shankar Jana is a Senior Product Marketing Manager for AWS Machine Learning. Currently he is working on building unique and scalable educational offerings for the aspiring ML developer communities- to help them expand their skills on ML. Outside of work he loves reading books, travelling and spending time with his family.


Financially empowering Generation Z with behavioral economics, banking, and AWS machine learning

This is a guest blog post by Dante Monaldo, co-founder and CTO of Pluto Money

Pluto Money, a San Francisco-based startup, is a free money management app that combines banking, behavioral economics, and machine learning (ML) to guide Generation Z towards their financial goals in college and beyond. We’re building the first mobile bank designed to serve the financial needs of Gen Z college students and grow with them beyond graduation.

The importance of establishing healthy financial habits early on is something that I and my co-founders Tim Yu and Susie Kim deeply believe in, having founded Pluto based on our own experiences. We apply financial rigor to our business in the same way. Using the cloud was a natural choice for us, as cloud services have lowered costs and brought flexibility previously unimaginable to rapidly growing companies.

We chose to use AWS as our primary cloud platform, from core compute to ML, because the AWS solutions are robust and work seamlessly together. Our team is growing, and—as is the case with many startups—we all wear many hats. As such, we rely on the AWS offerings to save us time while giving us an enterprise-grade tech stack to build on as we scale our team.

The heart of Pluto Money is our client API, which serves all requests originating from the Pluto Money mobile app. Written in Node.js, it runs on Amazon Elastic Compute Cloud (EC2) instances behind a Classic Load Balancer. This was architected before AWS released the Network Load Balancer and Application Load Balancer options. However, the Classic Load Balancer serves the same purpose for us as an Application Load Balancer, and we will likely migrate to it in the near future. The instances scale based on a combination of CPU utilization and the number of concurrent requests.

All persistent data—such as user accounts, saving goals and financial transactions—is stored in an encrypted MongoDB replica set. To minimize latency, many requests are pulled from a Redis cache that is stored locally on the NodeJS Amazon EC2 instances (because why make a 10 ms MongoDB request when a 1ms cache request will do?). The cache expires and refreshes periodically to protect against stale data.

Some calculation-intensive requests take longer to process and are not as time-sensitive as requests originating from the mobile app, such as communicating with a user’s bank when they have new transactions or re-training models on new financial data. We push these requests into an Amazon Simple Queue Service (SQS) and have a group of AWS Elastic Beanstalk workers chip away at the queue. This prevents any increase in calculation-intensive requests from slowing down the client API.

Of course, we use Amazon SageMaker to train, test, and deploy our ML models. One such model uses anonymized spending data from users that opt-in to compare their finances to similar peers—based on criteria set in their user profiles. For example: Sarah, a 21-year-old college student at UCLA, can see how her spending anonymously compares to other 21-year-old female UCLA students’ spending across different categories and merchants. This comparison provides important context for college students who are trying to better understand their own spending behavior.

Models are trained and tested in Jupyter notebooks on Amazon SageMaker, using both proprietary algorithms and the built-in algorithms that are available. We love that we can train and test ML models at scale the same way any data scientist does locally on their machine. When it comes time to deploy a model, that same data scientist can create an endpoint and provide the request and response parameters to an engineer on the team. This handoff is much more efficient than having the engineer go back and forth with the data scientist trying to understand the intricacies of the model. When revisions are needed, we point the requests (originating from the group of EC2 instances mentioned before) to the new endpoint. This allows us to have multiple endpoints live for testing in different sandbox and development environments. Moreover, when the model is revised, the engineer doesn’t need to know that anything changed, so long as the request and response parameters stayed the same. This workflow has allowed Pluto Money to iterate quickly with new datasets, an important requirement for building accurate ML models.

Since Pluto Money’s public beta launch in late 2017, we have helped tens of thousands of students across more than 1,500 college campuses save money and form better financial habits. And we are excited to continue to scale our technology with the support of AWS. Gen Z will account for 40% of U.S. consumer spending by 2020. We at Pluto Money are building the bank of the future for Gen Z—one that is radically aligned with their financial wellness more than anything else.

Creating magical listening experiences with BlueToad and Amazon Polly

This is a guest blog post by Paul DeHart, co-owner and CEO, BlueToad.

BlueToad, one of the leading global providers of digital content solutions, prioritizes innovation. Since 2017, we have enabled publishers (our customers) to provide audio versions of articles found in their digital magazines using Amazon Polly.

We see that novel content experiences engage today’s audience. In addition to the significant growth seen in mobile content engagement, audio has emerged as a preferred content consumption method. A 2019 Infinite Dial study found that U.S. consumers reported an average of 17 hours of listening a week. Nearly 40%+ of Americans now own smart speakers like Amazon Echo. Furthermore, the time that Americans spend commuting is on the rise and most vehicles can easily access and play audio from a mobile device. As a result, 90 million Americans said they listened to a podcast last month.

Given this trend towards audio, we at BlueToad developed a solution to help publishers easily turn any article into a listening experience using Amazon Polly. When a reader opens a digital edition on their phone, they can choose the audio icon on the story to begin listening. From a publisher perspective, this feature is simple to implement, as it only requires checking a box on the BlueToad platform. BlueToad and Amazon Polly do all the heavy lifting.

We selected Amazon Polly for this solution because of its ease of use as well as its unmatched performance. When first implementing audio solutions, we tested Amazon Polly and a few other voice services and we ultimately found that Polly was the most consistently accurate.

With Polly’s newly released Neural Text-to-Speech (NTTS) Newscaster style voice, we are able to help publishers engage their audiences with realistic listening experiences at the touch of a button. (Amazon Polly released NTTS and Newscaster speaking styles on July 30, 2019; check out the documentation.)

The diverse set of Polly voices helps our customers deliver captivating audio experiences to their audiences, including matching publications’ local languages and accents. We work with many international publications, such as Estetica Magazine, whose hair and fashion magazine publishes 26 international editions distributed in 60 different countries. To help international readers enjoy the magazine, we provide narrations in different languages using Amazon Polly, such as the French-speaking Polly voices Mathieu, Céline, and Léa.

BlueToad offers U.S.-based customer SUCCESS Magazine a wide array of valuable audio, mobile, and other solutions powered by AWS. SUCCESS Magazine’s audience is interested in personal and professional development, and the magazine aims to reach those self-starter individuals in convenient ways amid their inevitably busy lives. Amazon Polly’s voice solutions form a large part of the answer, enabling a seamlessly hands-free content consumption experience.

The owner and CEO of SUCCESS Magazine, Stuart Johnson, comments, “The trends increasingly show that consumers are gravitating towards audio content. With the exceedingly high-quality speech that Amazon Polly now offers, we’re even better equipped to deliver these exceptional listening experiences to our audience.”

We also help SUCCESS by providing a mobile-optimized experience for their written content, enabling readers to engage wherever they are. The results speak for themselves: Over three years (2016-2019), article engagement on mobile phones increased by nearly 300%.

From a technical perspective, our implementation is straightforward. Using the Amazon Polly APIs, we generate MP3 audio files as soon as a new article publishes on our platform. Then, we store the resulting files in Amazon Simple Storage Service (Amazon S3) buckets. To always maintain the best possible narration quality, we automatically discard older audio files by setting lifecycle policies on the Amazon S3 buckets, which prompts the narrations to be regenerated with the latest set of Polly updates included. We have found that the Amazon Polly listening quality is extremely high and only keeps getting better.

Going forward, we’re excited about the opportunities to continue delighting our customers and their customers with the latest advances in the media industry. Thanks to AWS and Amazon Polly, we’re already able to deliver a best-in-class solution for our customers. We’re primed to keep improving and pushing the boundaries of what’s possible.

Breaking news: Amazon Polly’s Newscaster voice and more authentic speech, launching today

For a long time, it was only in science fiction that machines verbalized emotions. As of today, Amazon Polly is one step closer to changing that.

As we work on Amazon Polly, we’re constantly seeking to improve the voices. We hope you’ll agree that today’s announcement of not only Neural Text-to-Speech (NTTS) but also the Newscaster style is, well, newsworthy.

Hear the news from Polly:

Listen now 

Voiced by Amazon Polly

Synthesizing the newsperson style is innovative and unprecedented. And it brings great excitement in the media world and beyond.

Our earliest users include media giants like Gannett (whose USA Today is the most widely read US newspaper) and The Globe and Mail (the biggest newspaper in Canada), publishing leaders (whose customers, in turn, are news outlets) such as BlueToad and TIM Media, as well as organizations in education, healthcare, and gaming.

“We strive to innovate and bring our audiences news and content wherever they are. With more than 100 newsrooms across the country, it’s important for Gannett | USA TODAY NETWORK to produce audio content efficiently. Services like Amazon Polly and features like its Newscaster voice help us deliver breaking news and original reporting with increased speed and fidelity worthy of our brands,” says Gannett’s Scott Stein, Vice President of Content Ventures.

Greg Doufas, Chief Technical and Digital Officer at The Globe and Mail, concurs that the newest offerings with Amazon Polly are on the cutting edge. “Amazon Polly Newscaster enables us to provide our readers with more features to further their experience with our newspaper. This text-to-voice feature from AWS is miles ahead of anything we’ve heard to date.”

The early days of Amazon Polly are showing that readers enjoy engaging with Polly’s Newscaster voice. Paul DeHart, CEO of BlueToad, comments, “We focus on providing a robust and technologically advanced suite of digital solutions for our customers. When Amazon Polly’s new NTTS and Newscaster offerings came along, we immediately jumped on them, and we’ve already seen excitement among our own customer base. SUCCESS Magazine is particularly enthused about the new offerings.”

Stuart Johnson, Owner and CEO of SUCCESS, elaborates, “The trends increasingly show that consumers are gravitating towards audio content. With the exceedingly high quality speech that Polly now offers, we’re even better equipped to deliver these exceptional listening experiences to our audience.”

The team at Trinity Audio, a TIM Media brand that touts itself as “an audio content solution, providing publishers new ways to engage audiences,” is very animated about the announcements. “Who doesn’t want to listen to the news by an articulate reader who never says ‘um’?” asks Ron Jaworski, CEO of Trinity Audio.

Publishers such as Minute Media, a sports article and video provider, are enthusiastic about the new AWS offerings as well, which they work with Trinity Audio to leverage. Rich Routman, President & CRO of Minute Media, explains, “At Minute Media, we seek to partner with best-in-breed technology solutions, [and with AWS and Trinity], we have the technology to transition our scale in the written word to audio at scale and across multiple platforms, aligning ourselves further with this emerging platform for media consumption.”

News companies’ excitement about Amazon Polly’s latest advance are reflected by non-news sources as well. “We make voice-controlled games at Volley – games where players get to converse with other characters. We are constantly asking, ‘What new experiences can be possible with voice as an input?’ We can’t wait to start developing a game leveraging the Newscaster style, where our players get to engage with a brand new character in a fun and educational new way,” says James Wilsterman, Volley’s Founder and CTO.

Echoing that excitement is Encyclopedia Britannica. The widely read encyclopedia switched to online-only content in 2012, and its hundreds of thousands of articles can be read or listened to via its “Read to Me” feature voiced by Amazon Polly. Vice President Matt Dube comments, “When we think about our next steps and innovations, this high-caliber voice technology has been one of the missing pieces for us. We’re excited to use it as we continue innovating.” The team has several new efforts underway that utilize the rich spoken content to help their users deepen their knowledge.

And for CommonLit, a nonprofit ed-tech organization dedicated to ensuring that all students graduate high school with the reading and writing skills necessary to succeed in college and beyond, Polly’s solution is transformative. Each of the thousands of texts in CommonLit’s content library features a “Read Aloud” button, and the organization is importing new texts with Amazon Polly NTTS as the reading voice.

CommonLit CTO Geoff Harcourt says, “With the latest for Polly, we’re able to offer learners an experience that passes the Turing Test; our users would be hard-pressed to realize that the voice reading to them is not human.” The CommonLit team appreciates the support that this tool provides to struggling readers and English-language-learner (ELL) students, as “this helps students learn pronunciation, and provides a crucial scaffold for students with learning difficulties,” Harcourt adds.

Listen to learn about the Turing Test:

Listen now

Voiced by Amazon Polly

The technologies behind Amazon Polly are now starting to mimic the workings of the human brain, by leveraging a scientific advance called machine learning to build Neural Text-to-Speech systems (NTTS). Similar to the way human children learn to speak, these systems generate sounds, then improve their speech by listening to recorded natural speech and copying it. To build Polly’s NTTS system, Amazon researchers first taught the neural network the basics of how to speak by exposing it to a vast quantity of natural speech (the “training data” in technical terms). Over time, it learned how to reproduce those example utterances and, eventually, to generalize from them to produce new utterances. Because the network learned how to speak by example, the generated sounds are more lifelike than before. Now, Polly’s NTTS system enables it to easily learn the differences between speaking styles and rapidly adapt to new styles.

You can take Amazon Polly for a spin today by visiting https://aws.amazon.com/polly/features/.


About the Author

Robin Dautricourt is a Principal Product Manager for Amazon Text-to-Speech, and he leads product management for Amazon Polly. He enjoys innovating on behalf of customers, to launch features that will benefit their business needs and end users. He enjoys spending his free time with his wife and kids.


Running Amazon Elastic Inference Workloads on Amazon ECS

Amazon Elastic Inference (EI) is a new service launched at re:Invent 2018. Elastic Inference reduces the cost of running deep learning inference by up to 75% compared to using standalone GPU instances. Elastic Inference lets you attach accelerators to any Amazon SageMaker or Amazon EC2 instance type and run inference on TensorFlow, Apache MXNet, and ONNX models. Amazon ECS is a highly scalable, high-performance container orchestration service that supports Docker containers and allows you to run and scale containerized applications on AWS easily.

In this post, I describe how to accelerate deep learning inference workloads in Amazon ECS by using Elastic Inference. I also demonstrate how multiple containers, running potentially different workloads on the same ECS container instance, can share a single Elastic Inference accelerator. This sharing enables higher accelerator utilization.

As of February 4, 2019, ECS supports pinning GPUs to tasks. This works well for training workloads. However, for inference workloads, using Elastic Inference from ECS is more cost effective when those GPUs are not fully used.

For example, the following diagram shows a cost efficiency comparison of a p2/p3 instance type and a c5.large instance type with each type of Elastic Inference accelerator per 100K single-threaded inference calls (normalized by minimal cost):

TensorFlow: Inference Cost Efficiency with EI

MXNet: Inference Cost Efficiency with EI

Using Elastic Inference on ECS

As an example, this post spins up TensorFlow ModelServer containers as part of an ECS task. You try to identify objects in a single image (the giraffe image that follows), using an SSD with ResNet-50 model, trained with a COCO dataset.

Next, you profile and compare the inference latencies of both a regular and an Elastic Inference–enabled TensorFlow ModelServer. Base your profiling setup on the Elastic Inference with TensorFlow Serving example. You can follow step-by-step instructions or launch an AWS CloudFormation stack with the same infrastructure as this post. Either way, you must be logged into your AWS account as an administrator. For AWS CloudFormation stack creation, choose Launch Stack and follow the instructions.

If Elastic Inference is not supported in the selected Availability Zone, delete and re-create the stack with a different zone. To launch the stack in a Region other than us-east-1, use the same template and template URL. Make sure to select the appropriate Region and Availability Zone.

After choosing Launch Stack, you can also examine the AWS CloudFormation template in detail in AWS CloudFormation Designer.

The AWS CloudFormation stack includes the following resources:

  • A VPC
  • A subnet
  • An Internet gateway
  • An Elastic Inference endpoint
  • IAM roles and policies
  • Security groups and rules
  • Two EC2 instances
    • One for running TensorFlow ModelServer containers (this instance has an Elastic Inference accelerator attached and works as an ECS container instance).
    • One for running a simple client application for making inference calls against the first instance.
  • An ECS task definition

After you create the AWS CloudFormation stack:

  • Go directly to the Running an Elastic Inference-enabled TensorFlow ModelServer task section in this post.
  • Skip Making inference calls.
  • Go directly to Verifying the results.

The second instance runs an example application as part of the bootstrap script.

Make sure to delete the stack once it is no longer needed.

Create an ecsInstanceRole to be used by the ECS container instance

In this step, you create an ecsInstanceRole role to be used by the ECS container instance through an associated instance profile.

In the IAM console, check if an ecsInstanceRole role exists. If the role does not exist, create a new role with the managed policy AmazonEC2ContainerServiceforEC2Role attached and name it ecsInstanceRole. Update its trust policy with the following code:

{
  "Version": "2008-10-17",
  "Statement": [
    {
      "Sid": "",
      "Effect": "Allow",
      "Principal": {
        "Service": "ec2.amazonaws.com"
      },
      "Action": "sts:AssumeRole"
    }
  ]
}

Setting up an ECS container instance for Elastic Inference

Your goal is to launch an ECS container instance with an Elastic Inference endpoint attached and with the following additional properties:

Launching the stack automates the setup process. To execute the steps manually, follow the instructions to set up an EC2 instance for Elastic Inference. Make the following changes to these procedures, for simplicity.

Because you plan to call Elastic Inference from ECS tasks, define a task role with relevant permissions. In the IAM console, create a new role with the following properties:

  • Trusted entity type: AWS service
  • Service to use this role: Elastic Container Service
  • Select your use case: Elastic Container Service Task
  • Name: ecs-ei-task-role

In the Attach permissions policies step, select the policy that you created in Set up an EC2 instance for Elastic Inference step. The policy’s content should look like the following example:

{
    "Statement": [
        {
            "Effect": "Allow",
            "Resource": "*",
            "Action": [
                "elastic-inference:Connect",
                "iam:List*",
                "iam:Get*",
                "ec2:Describe*",
                "ec2:Get*"
            ]
        }
    ],
    "Version": "2012-10-17"
}

Only the elastic-inference:Connect permission is required. The remaining permissions provide troubleshooting assistance. You can remove them for production setup.

To validate the role’s trust relationship, on the Trust Relationships tab, choose Show policy document. The policy should look like the following:

{
  "Version": "2012-10-17",
  "Statement": [
    {
      "Sid": "",
      "Effect": "Allow",
      "Principal": {
        "Service": "ecs-tasks.amazonaws.com"
      },
      "Action": "sts:AssumeRole"
    }
  ]
}

Creating an ECS task execution IAM role

Running on an ECS container instance, the ECS agent needs permissions to make ECS API calls on behalf of the task (for example, pulling container images from ECR). As a result, you must create an IAM role that captures the exact permissions needed. If you’ve created any ECS tasks before, you probably have created this or an equivalent role. For more information, see ECS Task Execution IAM Role.

If no such role exists, in the IAM console, choose Roles and create a new role with the following properties:

  • Trusted entity type: AWS service
  • Service to this role: Elastic Container Service
  • Select your use case: Elastic Container Service Task
  • Name: ecsTaskExecutionRole
  • Attached managed policy: AmazonECSTaskExecutionRolePolicy

Creating a task definition for both regular and Elastic Inference–enabled TensorFlow ModelServer containers

In this step, you create an ECS task definition comprising two containers:

  • One running TensorFlow ModelServer
  • One running an Elastic Inference-enabled TensorFlow ModelServer

Both containers use tensorflow-inference: 1.13-cpu-py27-ubuntu16.04 image (one of the newly released Deep Learning Containers Images). These images already have a regular TensorFlow ModelServer and all its library dependencies. Both containers retrieve and set up the relevant model.

Second container, downloads the Elastic Inference-enabled TensorFlow ModelServer binary. It also removes the ECS_CONTAINER_METADATA_URI environment variable setting to enable Elastic Inference endpoint metadata lookup from the ECS container instance’s metadata:

# install unzip
apt-get --assume-yes install unzip
# download and unzip the model
wget https://s3-us-west-2.amazonaws.com/aws-tf-serving-ei-example/ssd_resnet.zip -P /models/ssdresnet/
unzip -j /models/ssdresnet/ssd_resnet.zip -d /models/ssdresnet/1
# download and extract Elastic Inference enabled TensorFlow Serving
wget https://s3.amazonaws.com/amazonei-tensorflow/tensorflow-serving/v1.13/ubuntu/latest/tensorflow-serving-1-13-1-ubuntu-ei-1-1.tar.gz
tar xzvf tensorflow-serving-1-13-1-ubuntu-ei-1-1.tar.gz
# make the binary executable
chmod +x tensorflow-serving-1-13-1-ubuntu-ei-1-1/amazonei_tensorflow_model_server
# Unset the ECS_CONTAINER_METADATA_URI environment variable to force Elastic Inference endpoint metadata lookup from ECS container instance's metadata.
# Otherwise, Elastic Inference endpoint metadata would tried to be retrieved from container metadata, which would fail.   
env -u ECS_CONTAINER_METADATA_URI tensorflow-serving-1-13-1-ubuntu-ei-1-1/amazonei_tensorflow_model_server --port=${GRPC_PORT} --rest_api_port=${REST_PORT} --model_name=${MODEL_NAME} --model_base_path=${MODEL_BASE_PATH}/${MODEL_NAME}

For a regular production setup, I recommend creating a new image from the deep learning container image by turning relevant steps into Dockerfile RUN commands. For this post, you can skip that for simplicity’s sake.

First container downloads model and then, runs the unchanged /usr/bin/tf_serving_entrypoint.sh:

#!/bin/bash 

tensorflow_model_server --port=8500 --rest_api_port=8501 --model_name=${MODEL_NAME} --model_base_path=${MODEL_BASE_PATH}/${MODEL_NAME} "$@"

In the ECS console, under Task Definitions, choose Create New Task Definitions.

In the Select launch type compatibility dialog box, choose EC2.

In the Create new revision of Task Definition dialog box, scroll to the bottom of the page and choose Configure via JSON.

Paste the following definition into the space provided. Before saving, make sure to replace the two occurrences of <replace-with-your-account-id> with your AWS account ID.

{
    "executionRoleArn": "arn:aws:iam::<replace-with-your-account-id>:role/ecsTaskExecutionRole",
    "containerDefinitions": [
        {
            "entryPoint": [
                "bash",
                "-c",
                "apt-get --assume-yes install unzip; wget https://s3-us-west-2.amazonaws.com/aws-tf-serving-ei-example/ssd_resnet.zip -P ${MODEL_BASE_PATH}/${MODEL_NAME}/; unzip -j ${MODEL_BASE_PATH}/${MODEL_NAME}/ssd_resnet.zip -d ${MODEL_BASE_PATH}/${MODEL_NAME}/1/; /usr/bin/tf_serving_entrypoint.sh"
            ],
            "portMappings": [
                {
                    "hostPort": 8500,
                    "protocol": "tcp",
                    "containerPort": 8500
                },
                {
                    "hostPort": 8501,
                    "protocol": "tcp",
                    "containerPort": 8501
                }
            ],
            "cpu": 0,
            "environment": [
                {
                    "name": "KMP_SETTINGS",
                    "value": "0"
                },
                {
                    "name": "TENSORFLOW_INTRA_OP_PARALLELISM",
                    "value": "2"
                },
                {
                    "name": "MODEL_NAME",
                    "value": "ssdresnet"
                },
                {
                    "name": "KMP_AFFINITY",
                    "value": "granularity=fine,compact,1,0"
                },
                {
                    "name": "MODEL_BASE_PATH",
                    "value": "/models"
                },
                {
                    "name": "KMP_BLOCKTIME",
                    "value": "0"
                },
                {
                    "name": "TENSORFLOW_INTER_OP_PARALLELISM",
                    "value": "2"
                },
                {
                    "name": "OMP_NUM_THREADS",
                    "value": "1"
                }
            ],
            "mountPoints": [],
            "volumesFrom": [],
            "image": "763104351884.dkr.ecr.us-east-1.amazonaws.com/tensorflow-inference:1.13-cpu-py27-ubuntu16.04",
            "essential": true,
            "name": "ubuntu-tfs"
        },
        {
            "entryPoint": [
                "bash",
                "-c",
                "apt-get --assume-yes install unzip; wget https://s3-us-west-2.amazonaws.com/aws-tf-serving-ei-example/ssd_resnet.zip -P /models/ssdresnet/; unzip -j /models/ssdresnet/ssd_resnet.zip -d /models/ssdresnet/1; wget https://s3.amazonaws.com/amazonei-tensorflow/tensorflow-serving/v1.13/ubuntu/latest/tensorflow-serving-1-13-1-ubuntu-ei-1-1.tar.gz; tar xzvf tensorflow-serving-1-13-1-ubuntu-ei-1-1.tar.gz; chmod +x tensorflow-serving-1-13-1-ubuntu-ei-1-1/amazonei_tensorflow_model_server; env -u ECS_CONTAINER_METADATA_URI tensorflow-serving-1-13-1-ubuntu-ei-1-1/amazonei_tensorflow_model_server --port=${GRPC_PORT} --rest_api_port=${REST_PORT} --model_name=${MODEL_NAME} --model_base_path=${MODEL_BASE_PATH}/${MODEL_NAME}"
            ],
            "portMappings": [
                {
                    "hostPort": 9000,
                    "protocol": "tcp",
                    "containerPort": 9000
                },
                {
                    "hostPort": 9001,
                    "protocol": "tcp",
                    "containerPort": 9001
                }
            ],
            "cpu": 0,
            "environment": [
                {
                    "name": "GRPC_PORT",
                    "value": "9000"
                },
                {
                    "name": "REST_PORT",
                    "value": "9001"
                },
                {
                    "name": "MODEL_NAME",
                    "value": "ssdresnet"
                },
                {
                    "name": "MODEL_BASE_PATH",
                    "value": "/models"
                }
            ],
            "mountPoints": [],
            "volumesFrom": [],
            "image": "763104351884.dkr.ecr.us-east-1.amazonaws.com/tensorflow-inference:1.13-cpu-py27-ubuntu16.04",
            "essential": true,
            "name": "ubuntu-tfs-ei"
        }
    ],
    "memory": "2048",
    "taskRoleArn": "arn:aws:iam::<replace-with-your-account-id>:role/ecs-ei-task-role",
    "family": "ei-ecs-ubuntu-tfs-bridge-s3",
    "requiresCompatibilities": [
        "EC2"
    ],
    "networkMode": "bridge",
    "volumes": [],
    "placementConstraints": []
}

You could create an ECS service out of this task definition, but for the sake of this post, you need only run the task.

Running an Elastic Inference–enabled TensorFlow ModelServer task

Make sure to run the task defined in the previous section on the previously created ECS container instance. Register this instance to your default cluster.

In the ECS console, choose Clusters.

Confirm that your EC2 container instance appears in the ECS Instances tab.

Choose TasksRun new task.

For Launch type, select EC2, then pick previously created task (task created by CloudFormation template is named ei-ecs-blog-ubuntu-tfs-bridge) and choose Run Task.

Making inference calls

In this step, you create and run a simple client application to make multiple inference calls using the previously built infrastructure. You also launch an EC2 instance with Deep Learning AMI (DLAMI) on which to run the client application. The TensorFlow library that you use in this example requires the AVX2 instructions set.

Pick the c5.large instance type. Any of the latest generation x86-based EC2 instance types with sufficient memory are fine. The DLAMI provides preinstalled libraries on which TensorFlow relies. Also, because DLAMI is an HVM virtualization type AMI, you can take advantage of the AVX2 instruction set provided by c5.large.

Download labels and an example image to do the inference on:

curl -O https://raw.githubusercontent.com/amikelive/coco-labels/master/coco-labels-paper.txt
curl -O https://s3.amazonaws.com/amazonei/media/3giraffes.jpg

Create a local file named ssd_resnet_client.py, with the following content:

from __future__ import print_function
import grpc
import tensorflow as tf
from PIL import Image
import numpy as np
import time
import os
from tensorflow_serving.apis import predict_pb2
from tensorflow_serving.apis import prediction_service_pb2_grpc

tf.app.flags.DEFINE_string('server', 'localhost:8500',
                           'PredictionService host:port')
tf.app.flags.DEFINE_string('image', '', 'path to image in JPEG format') 
FLAGS = tf.app.flags.FLAGS

if(FLAGS.image == ''):
  print("Supply an Image using '--image [path/to/image]'")
  exit(1)

local_coco_classes_txt = "coco-labels-paper.txt"
 
# Setting default number of predictions
NUM_PREDICTIONS = 20

# Reading coco labels to a list 
with open(local_coco_classes_txt) as f:
  classes = ["No Class"] + [line.strip() for line in f.readlines()]

def main(_):
 
  channel = grpc.insecure_channel(FLAGS.server)
  stub = prediction_service_pb2_grpc.PredictionServiceStub(channel)
 
  with Image.open(FLAGS.image) as f:
    f.load()
    
    # Reading the test image given by the user 
    data = np.asarray(f)

    # Setting batch size to 1
    data = np.expand_dims(data, axis=0)

    # Creating a prediction request 
    request = predict_pb2.PredictRequest()
 
    # Setting the model spec name
    request.model_spec.name = 'ssdresnet'
 
    # Setting up the inputs and tensors from image data
    request.inputs['inputs'].CopyFrom(
        tf.contrib.util.make_tensor_proto(data, shape=data.shape))
 
    # Iterating over the predictions. The first inference request can take several seconds to complete

    durations = []

    for curpred in range(NUM_PREDICTIONS): 
      if(curpred == 0):
        print("The first inference request loads the model into the accelerator and can take several seconds to complete. Please standby!")

      # Start the timer 
      start = time.time()
 
      # This is where the inference actually happens 
      result = stub.Predict(request, 60.0)  # 60 secs timeout
      duration = time.time() - start
      durations.append(duration)
      print("Inference %d took %f seconds" % (curpred, duration))

    # Extracting results from output 
    outputs = result.outputs
    detection_classes = outputs["detection_classes"]

    # Creating an ndarray from the output TensorProto
    detection_classes = tf.make_ndarray(detection_classes)

    # Creating an ndarray from the detection_scores
    detection_scores = tf.make_ndarray(outputs['detection_scores'])
 
    # Getting the number of objects detected in the input image from the output of the predictor 
    num_detections = int(tf.make_ndarray(outputs["num_detections"])[0])
    print("%d detection[s]" % (num_detections))

    # Getting the class ids from the output and mapping the class ids to class names from the coco labels with associated detection score
    class_label_score = ["%s: %.2f" % (classes[int(detection_classes[0][index])], detection_scores[0][index]) 
                   for index in range(num_detections)]
    print("SSD Prediction is (label, probability): ", class_label_score)
    print("Latency:")
    for percentile in [95, 50]:
      print("p%d: %.2f seconds" % (percentile, np.percentile(durations, percentile, interpolation='lower')))
 
if __name__ == '__main__':
  tf.app.run()

Make sure to edit the ECS container instance’s security group to permit TCP traffic over ports 8500–8501 and 9000–9001 from the client instance IP address.

From the client instance, check connectivity and the status of the model:

SERVER_IP=<replace-with-ECS-container-instance-IP-address>
for PORT in 8501 9001
do
  curl -s http://${SERVER_IP}:${PORT}/v1/models/ssdresnet
done

Wait until you get two responses like the following:

{
 "model_version_status": [
  {
   "version": "1",
   "state": "AVAILABLE",
   "status": {
    "error_code": "OK",
    "error_message": ""
   }
  }
 ]
}

Then, proceed to run the client application:

source activate amazonei_tensorflow_p27
for PORT in 8500 9000
do
  python ssd_resnet_client.py --server=${SERVER_IP}:${PORT} --image 3giraffes.jpg
done

Verifying the results

The output should be similar to the following:

The first inference request loads the model into the accelerator and can take several seconds to complete. Please standby!
Inference 0 took 12.923095 seconds
Inference 1 took 1.363095 seconds
Inference 2 took 1.338855 seconds
Inference 3 took 1.311022 seconds
Inference 4 took 1.305457 seconds
Inference 5 took 1.303680 seconds
Inference 6 took 1.297357 seconds
Inference 7 took 1.302721 seconds
Inference 8 took 1.299495 seconds
Inference 9 took 1.293291 seconds
Inference 10 took 1.305852 seconds
Inference 11 took 1.292999 seconds
Inference 12 took 1.300874 seconds
Inference 13 took 1.300001 seconds
Inference 14 took 1.297276 seconds
Inference 15 took 1.297859 seconds
Inference 16 took 1.305029 seconds
Inference 17 took 1.315366 seconds
Inference 18 took 1.288984 seconds
Inference 19 took 1.289530 seconds
4 detection[s]
SSD Prediction is (label, probability):  ['giraffe: 0.84', 'giraffe: 0.74', 'giraffe: 0.68', 'giraffe: 0.50']
Latency:
p95: 1.36 seconds
p50: 1.30 seconds
The first inference request loads the model into the accelerator and can take several seconds to complete. Please standby!
Inference 0 took 14.081767 seconds
Inference 1 took 0.295794 seconds
Inference 2 took 0.293941 seconds
Inference 3 took 0.311396 seconds
Inference 4 took 0.291605 seconds
Inference 5 took 0.285228 seconds
Inference 6 took 0.226951 seconds
Inference 7 took 0.283834 seconds
Inference 8 took 0.290349 seconds
Inference 9 took 0.228826 seconds
Inference 10 took 0.284496 seconds
Inference 11 took 0.293179 seconds
Inference 12 took 0.296765 seconds
Inference 13 took 0.230531 seconds
Inference 14 took 0.283406 seconds
Inference 15 took 0.292458 seconds
Inference 16 took 0.300849 seconds
Inference 17 took 0.294651 seconds
Inference 18 took 0.293372 seconds
Inference 19 took 0.225444 seconds
4 detection[s]
SSD Prediction is (label, probability):  ['giraffe: 0.84', 'giraffe: 0.74', 'giraffe: 0.68', 'giraffe: 0.50']
Latency:
p95: 0.31 seconds
p50: 0.29 seconds

If you launched the AWS CloudFormation stack, connect to the client instance with SSH and check the last several lines of this output in /var/log/cloud-init-output.log.

You see a 78% reduction in latency when using an Elastic Inference accelerator with this model and input.

You can launch more than one task and more than one container on the same ECS container instance. You can use the awsvpc network mode if tasks expose the same port numbers. For bridge mode, tasks should expose unique ports.

In multi-task/container scenarios, keep in mind that all clients share accelerator memory. AWS publishes accelerator memory utilization metrics to Amazon CloudWatch as AcceleratorMemoryUsage under the AWS/ElasticInference namespace.

Also, Elastic Inference–enabled containers using the same accelerator must all use either TensorFlow or the MXNet framework. To switch between frameworks, stop and start the ECS container instance.

Conclusion

The described setup shows how multiple deep learning inference workloads running in ECS can be efficiently accelerated by use of Elastic Inference. If inference workload tasks don’t use the entire GPU instance, then using Elastic Inference accelerators may offer an attractive alternative, at a fraction of the cost of dedicated GPU instances. A single accelerator’s capacity can be shared across multiple containers running on the same EC2 container instance, allowing for even greater use of the attached accelerator.


About the Author

Vladimir Mitrovic is a Software Engineer with AWS AI Deep Learning. He is passionate about building fault-tolerant, distributed deep-learning systems. In his spare time, he enjoys solving Project Euler problems.